I was using the Fuji 56mm lens on an X-E2 for part of a stock lifestyle shooting I was doing for
Blend Images. I have come to prefer the X-T1 for this type of work, but mine was in the shop having the light leak repaired. So I used the X-E2 instead. It only took a little while for me to recall how really good the viewfinder refresh rate really is on the X-T1. Working with a baby model is always unpredictable. You have to be constantly on the ready for that perfect expression and then start blazing away to capture it. The new viewfinder in the X-T1 is much better at this than the X-E2. Actually, the X-T1 is better at this by far than any other mirrorless camera.
The 56mm extremely sharp. It has a very wide open aperture that provides a pleasant softening effect (bokeh) in the out-of-focus areas. This gives me a lot to work with when I apply the techniques outlined below. Since my images are primarily used for commercial advertising, these soft areas provide a convenient area for art directors to place type.
 |
| This is the final image after re-working it in Photoshop with the high key techniques illustrated below. I selected this one because I loved the way the baby was playing with the model's curly hair. |
 |
| This is the original image before I began working on it. Other than brightening it up a bit, there wasn't much wrong with it and it could have been used as is. I added the burst and tonal effects to give the photo more of practical use as a background. I also cropped it and added some more clear, bright space to the right side as an area for superimposing type. |
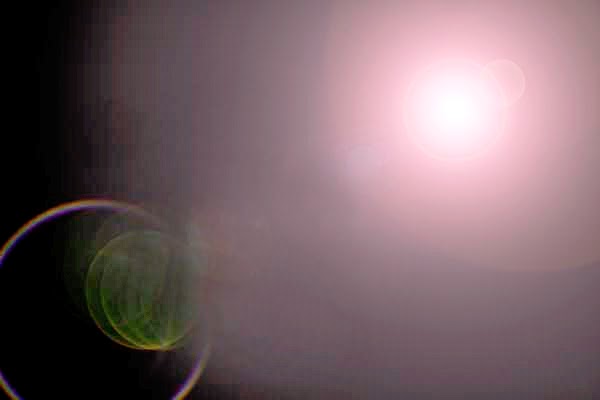 |
| This sun burst layer was created by adding a layer above the image and filling it with black. Next I selected Filter->Render->Lens Flarer and used the 50-300mm zoom flare effect set to 160%. This flare gives a lot of side artifacting coming from the bright spot and I had to paint it out where it fell over the models' faces. You don't have to be too careful with this layer because its details mostly fade out when you change the mode to Screen. sometimes the graphic edges in this layer are too sharp in which case I add a little Gaussian blur to soften their edges. |
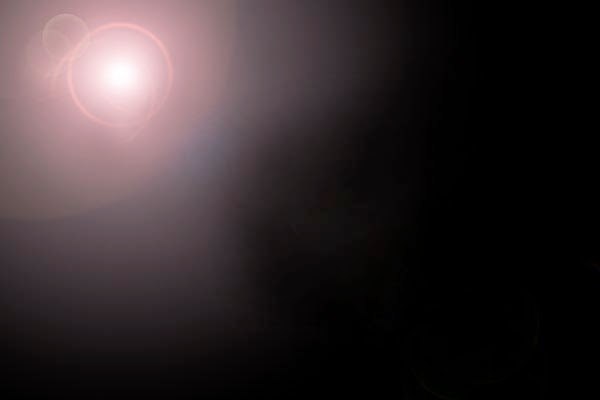 |
| Using the same technique as the flare above but with the intensity lowered to 110% and all the flaring circles painted out. |
 |
| This color layer was created by selecting a color from within the image and filling a new layer with it. I use this layer to provide tonal harmony to the photo. The layer mode was set to Soft Light. |
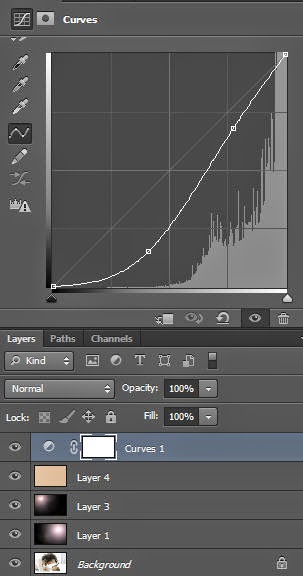 |
| The two sun burst flare layers 1 and 3 had their mode set to Screen. Layer 4 is a color selection from a section of the image and had its mode set to Soft Light. This reduced the contrast quite a bit, and lightened the image considerable. I added the Curves layer illustrated above to correct this. |
Below are a couple of other samples from the shoot. They were done in a similar manner, but with varying degrees of intensity in the technique.
 |
| This photo already had a soft effect on the left, added by shooting through a glass vase with the 56mm lens set to f/2. This added considerable blur. In Photoshop I added a single light burst in the upper left. Finally, I added a blue layer in Soft Light mode to provide a color cast. I picked the blue from the man's shirt. |
 |
| Done with almost the same technique as the photo above it, the color layer of this image was chosen for its warm tone. |

Thanks for the article Tom. Fuji really needs to update the X-E2 firmware for higher EVF refresh rate and wireless/remote shooting!
ReplyDelete